
Chicken Soup
team • September 5, 2019
My first apartment out of college was in the heart of Manhattan, NY. I shared a two-bedroom place with my oldest step-sibling, Lauren. We were lucky and had a very decently sized kitchen - something that was hard to come by in NYC with a monthly budget of our size.
Since I was now living on my own, I wanted to continue family traditions during the Jewish holidays and try my hand at Matzah Ball Soup. Granted, I was using a boxed mix for the matzah balls and chicken stock for the broth, but I still never made this soup myself. It felt like a right of passage to have to master this recipe in order to become a Jewish mother in the future.
The soup turned out delicious! Lauren and I devoured it. And we had plenty of leftovers - about enough to last a whole week. I divided the rest into the largest containers we had and kept it on the kitchen counter to cool for a bit before I would move it to the fridge.
The next morning, I woke up and went to make breakfast. And I was greeted by ALL the containers of soup that I forgot to put away!! My heart sank. ARE YOU FREAKIN' KIDDING ME?! My hours of hard work in the kitchen wasting away right before my eyes. The soup wasn't salvageable because I had used chicken stock for the broth and eggs in the matzah balls - two ingredients which don't hold up well sitting at room temperature for 8+ hours. You'd bet I told myself I would never make that mistake again.
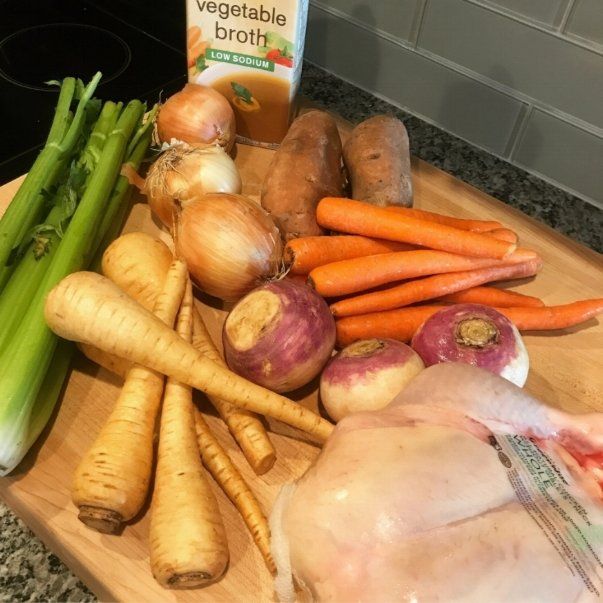
Life went on and I had made some other soups, but never totally from scratch. Fast forward about five years and I finally felt like I was ready to conquer chicken stock from scratch. I called up my mom, asked for some advice, and went on my way. I gathered all my ingredients - sweet potatoes, onions, parsnips, turnips, celery, carrots, a whole chicken, some vegetable stock and prepped away.
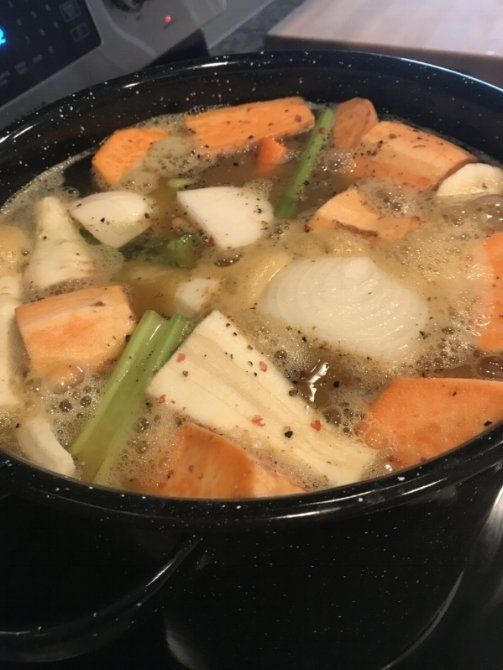
After about 4 hours of a medium-heat rolling boil, I yielded a stock that was out-of-this-world delicious. I couldn't believe it was that easy (albeit time consuming) to make stock myself. W O W.
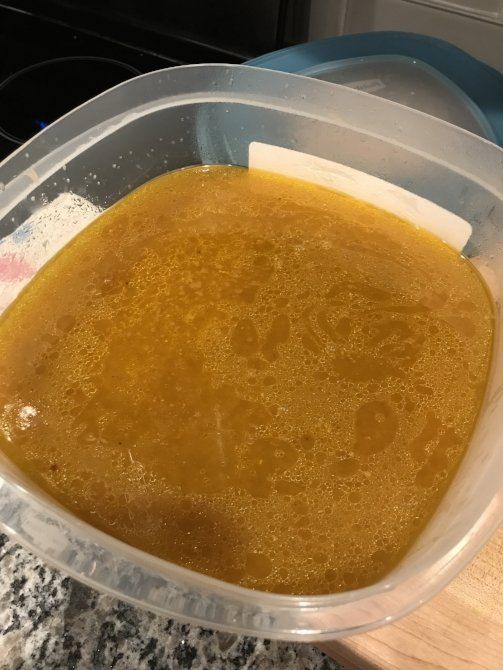
After Dave and I enjoyed a big bowl of soup that night, I proceeded to divide into containers to cool.
And...I forgot to put it away. AGAIN! I think I stood there frozen in shock this time for a good ten minutes before I could totally register what I had done. You would think I would learn my lesson the first time. Except this one pulled on my strings a little harder because I poured my heart into that soup pot.
UGH!!
If there's anything I learned from this experience, it is to SET A TIMER
or ALARM
so you don't forget to put it away!
Shame on me.
I told myself that incident couldn't stop me from making soup again in the future. So I tried it again, this time setting a timer, with much success.
One of the best things about this chicken soup recipe is that it is so versatile. I always add in some veggie stock (thanks for the tip, mom!) in addition to all the veggies for an extra boost of flavor. You can add in other veggies you love or have on hand, or omit any that you dislike. I like playing around with fresh herbs - current favorite is some fresh dill! I also love that so many of these veggies can be found at our local farmers market throughout the year, making it that much fresher and flavorful.
Here's how to make it. But don't forget to refrigerate it before the night is over ;)

Chicken Soup
prep time: 15 M
cook time: 4 hour
total time: 4 H & 15 M
ingredients:
- One whole chicken (neck and giblets removed)
- Celery Stalks, washed and cut into thirds
- Carrots, peeled and quartered
- White Onions, peeled and halved
- Turnips, peeled and quartered
- Parsnips, peeled and quartered
- Sweet Potatoes, peeled and quartered
- 2 bay leaves
- 1.75 gallons of filtered water
- 32 oz low sodium gluten free vegetable broth
- Lots of salt and pepper (to taste)
- Optional: Fresh dill
instructions:
How to cook Chicken Soup
- Thoroughly wash the chicken and place directly into the largest stock pot you have.
- Prepare all the vegetables by washing/peeling/slicing/chopping. Add them to the stock pot.
- Add the water and vegetable broth. Give it a generous seasoning of salt and pepper. Add in the bay leaves.
- Bring soup to a boil, then lower heat to medium. The soup will continue to boil for about four hours. Mix about 3-4 times per hour.
- You can give it a taste after about an hour and a half. Don't taste tooearly as you don't want the chicken to be raw! You'll need to add lots of salt and pepper as you go. The key is tasting every so often and adjusting the seasoning each time as you see fit. The more time that passes, the more developed the flavor will be.
- After the four hours, take out the chicken. Begin shredding it (it will be fork tender!) and remove any bones and place them into a discard bowl.
- It's always a good idea to strain the soup, to make sure you catch any stray bones at the bottom of the pot, as well as to remove the bay leaves. You can also remove any of the veggies that mushed up, and keep the ones that remained whole.
- Combine the strained broth, shredded chicken and remaining veggies.
- Serve hot and enjoy with matzah balls, noodles for some chicken noodle soup, as-is for a heart-warming meal, or any other way you can dream of!
- *The beauty of this recipe is that you can use as many or as little veggies, or any variety of veggies as you want. The more veggies you use, the more flavorful the stock will be. For this soup, I used about 8 celery stalks, 8 carrots, 5 parsnips, 3 turnips, 3 small onions and 2 sweet potatoes.
Other Recipes You May Like

These no-bake pecan clusters are the perfect cure for my sweet tooth. Simple to make and only require a couple of ingredients!

These easy grab-and-go pancake muffins are the perfect breakfast for busy mornings. Prep a big batch at once and enjoy them all week long!
The only basil pesto recipe you need. So good on pasta, with shrimp, in a sandwich or by the spoonful.
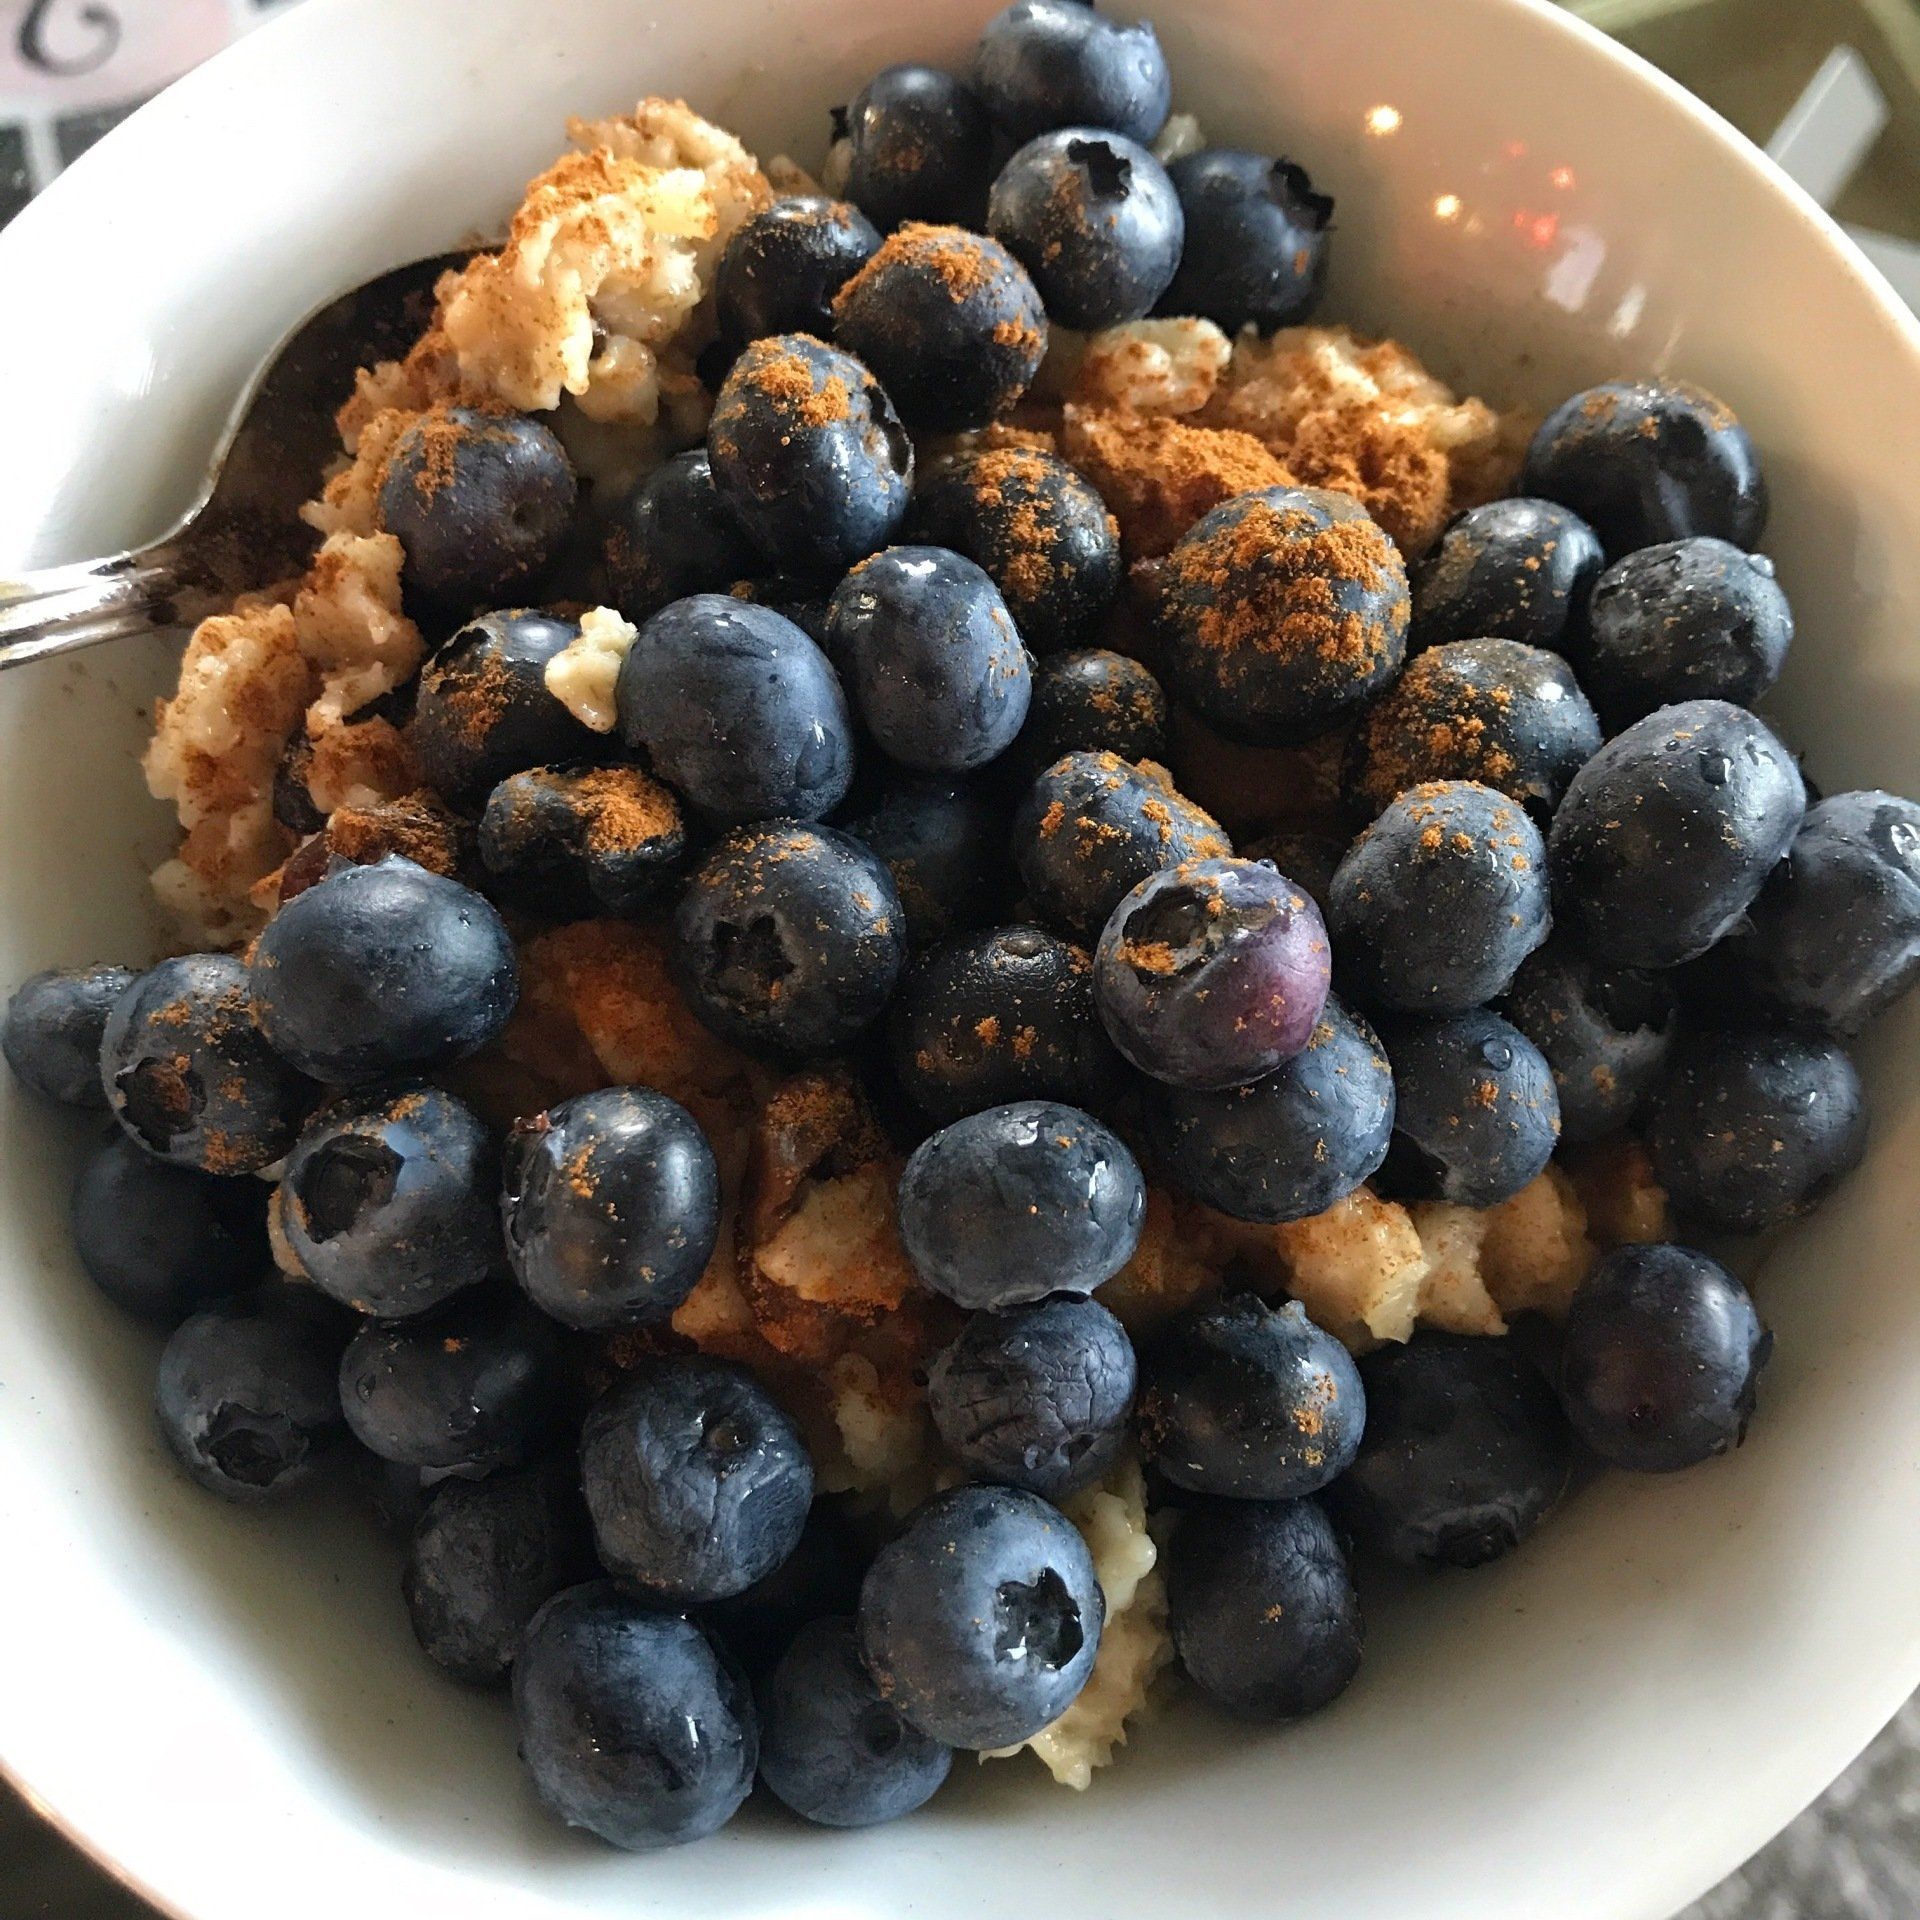
Oatmeal for breakfast is my go-to for meal prep when the thought of eggs isn't eggsactly sitting well with me. One of my favorite things about oatmeal is that it's warm and hearty. It always seems to hit the spot, too. It's versatile and can be combined with so many different toppings - like fruit, nuts, granola, nut butters, and cinnamon. Another bonus: it's easy to cook a lot of oatmeal at once and enjoy it all week long without a lot of extra effort. The recipe below calls for 2-3 servings, so you can simply double the water and oats to make a double batch. To me, oatmeal isn't complete without the addition of raisins, though you can certainly omit them if they aren't your thing. Same goes for the fruit on top. You can use blueberries, sub them for strawberries or whatever your favorite fruit (or other) toppings are, or do without them. I also always add cinnamon - maybe an amount some might think is a little crazy - just before serving for that finishing touch. I also am 100% team #ThickOatmeal, though I know plenty of people enjoy it a little looser than I do. If that's the case, add in a nice splash of your favorite milk while it's still on the stove just before you serve it.

It's pretty crazy just how much Trader Joe's cauliflower gnocchi has taken over the internet in 2019. Those little pouches of fluffy goodness are so versatile and really are like a blank canvas for any sort of flavors you want to combine them with. Enter: these sweet, decadent Cinnamon Sugar Gnocchi! They are a TREAT! Warm crispy gnocchi, tossed in a mixture of cinnamon and sugar. They remind me of a cinnamon sugar donut but "healthier" ... okay maybe that word is a little bit of a stretch, but hey. We all deserve everything in moderation. Are they breakfast? Yes. Are they dessert? Yes. Are they delicious no matter what time of day you eat them? YES. I hope you enjoy this recipe as much as I did!
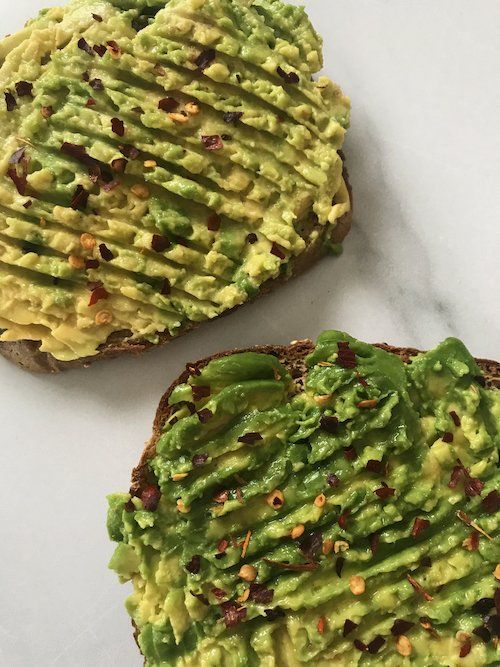
Yes, we all know that avocado toast has the reputation of being basic and a food that is totes popular with the millennial generation. I can be pretty basic at times, and I am a millennial, so that explains why I love it so much! On its own, the avocado is a powerhouse little fruit (yes, fruit!). It's packed with lots of nutrients your body needs to keep happy and healthy. I always try to keep a few avocados in our stash, so I can easily incorporate them into my meals - sliced with eggs, smashed on toast, transformed into guac, added to salads or tacos. Above all though, my favorite application for avocado time after time is always smashed on toast. Even better - it can make for a light meal or an easy snack when combined with a pinch of salt and a sprinkle of crushed red pepper. You can dress it up with some tomato slices, or make it into more of a complete meal by adding a drippy egg on top, or serving it alongside scrambled eggs as an alternate to butter on your toast. There are really so many options. Here's one of my favorite avocado tips so you don't constantly slice them open to find them brown all over: Once they begin to feel ripe by gently squeezing the fruit and feeling a tiny amount of give, place them into the fridge and they will last even longer than on your countertop.
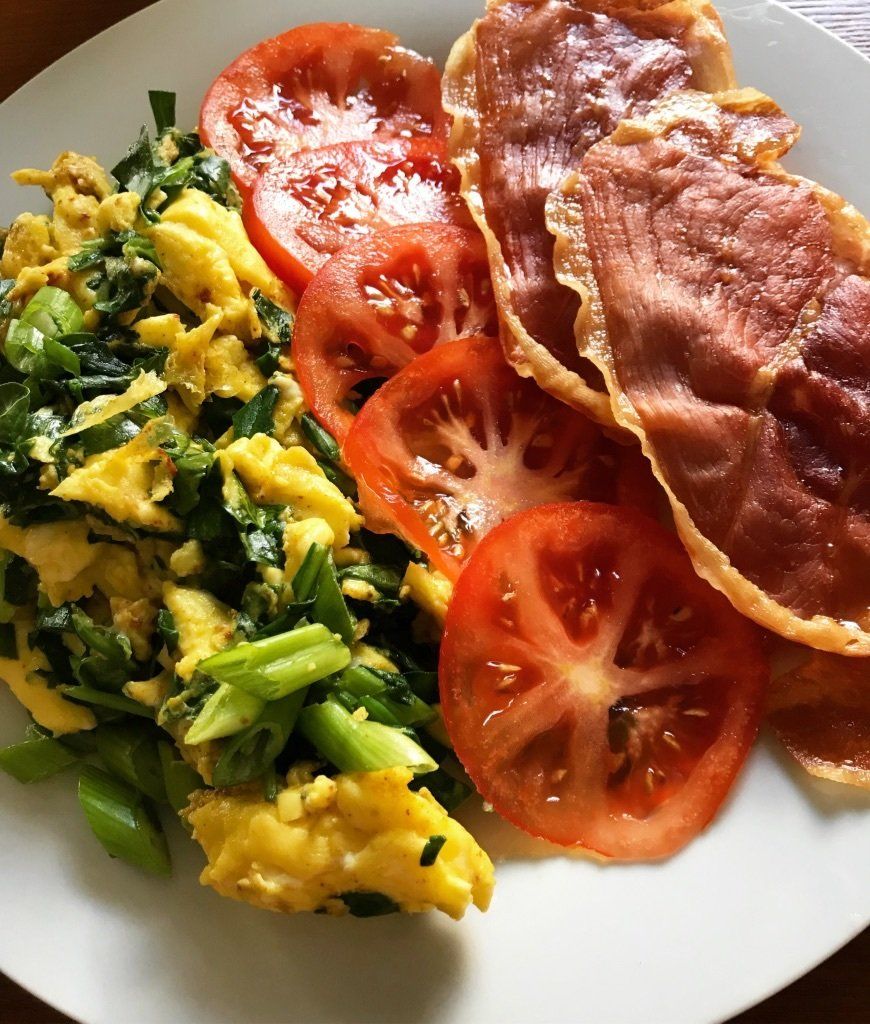
Think of Crispy Prosciutto as the best big sister to bacon. When baked just right, it's crispy, salty and seriously heavenly. Don't get me wrong - plain old prosciutto slices on their own or as part of a charcuterie board are what dreams are made of and one of my absolute favorite indulgdences. In the rare event that you bought too much (is this a thing?) or have some leftovers that you won't be able to eat in time for it to be perfectly fresh, it doesn't have to go to waste! I randomly decided to bake up a few slices we had left for breakfast one morning and you could say it was one of the best decisions ever. YUM!
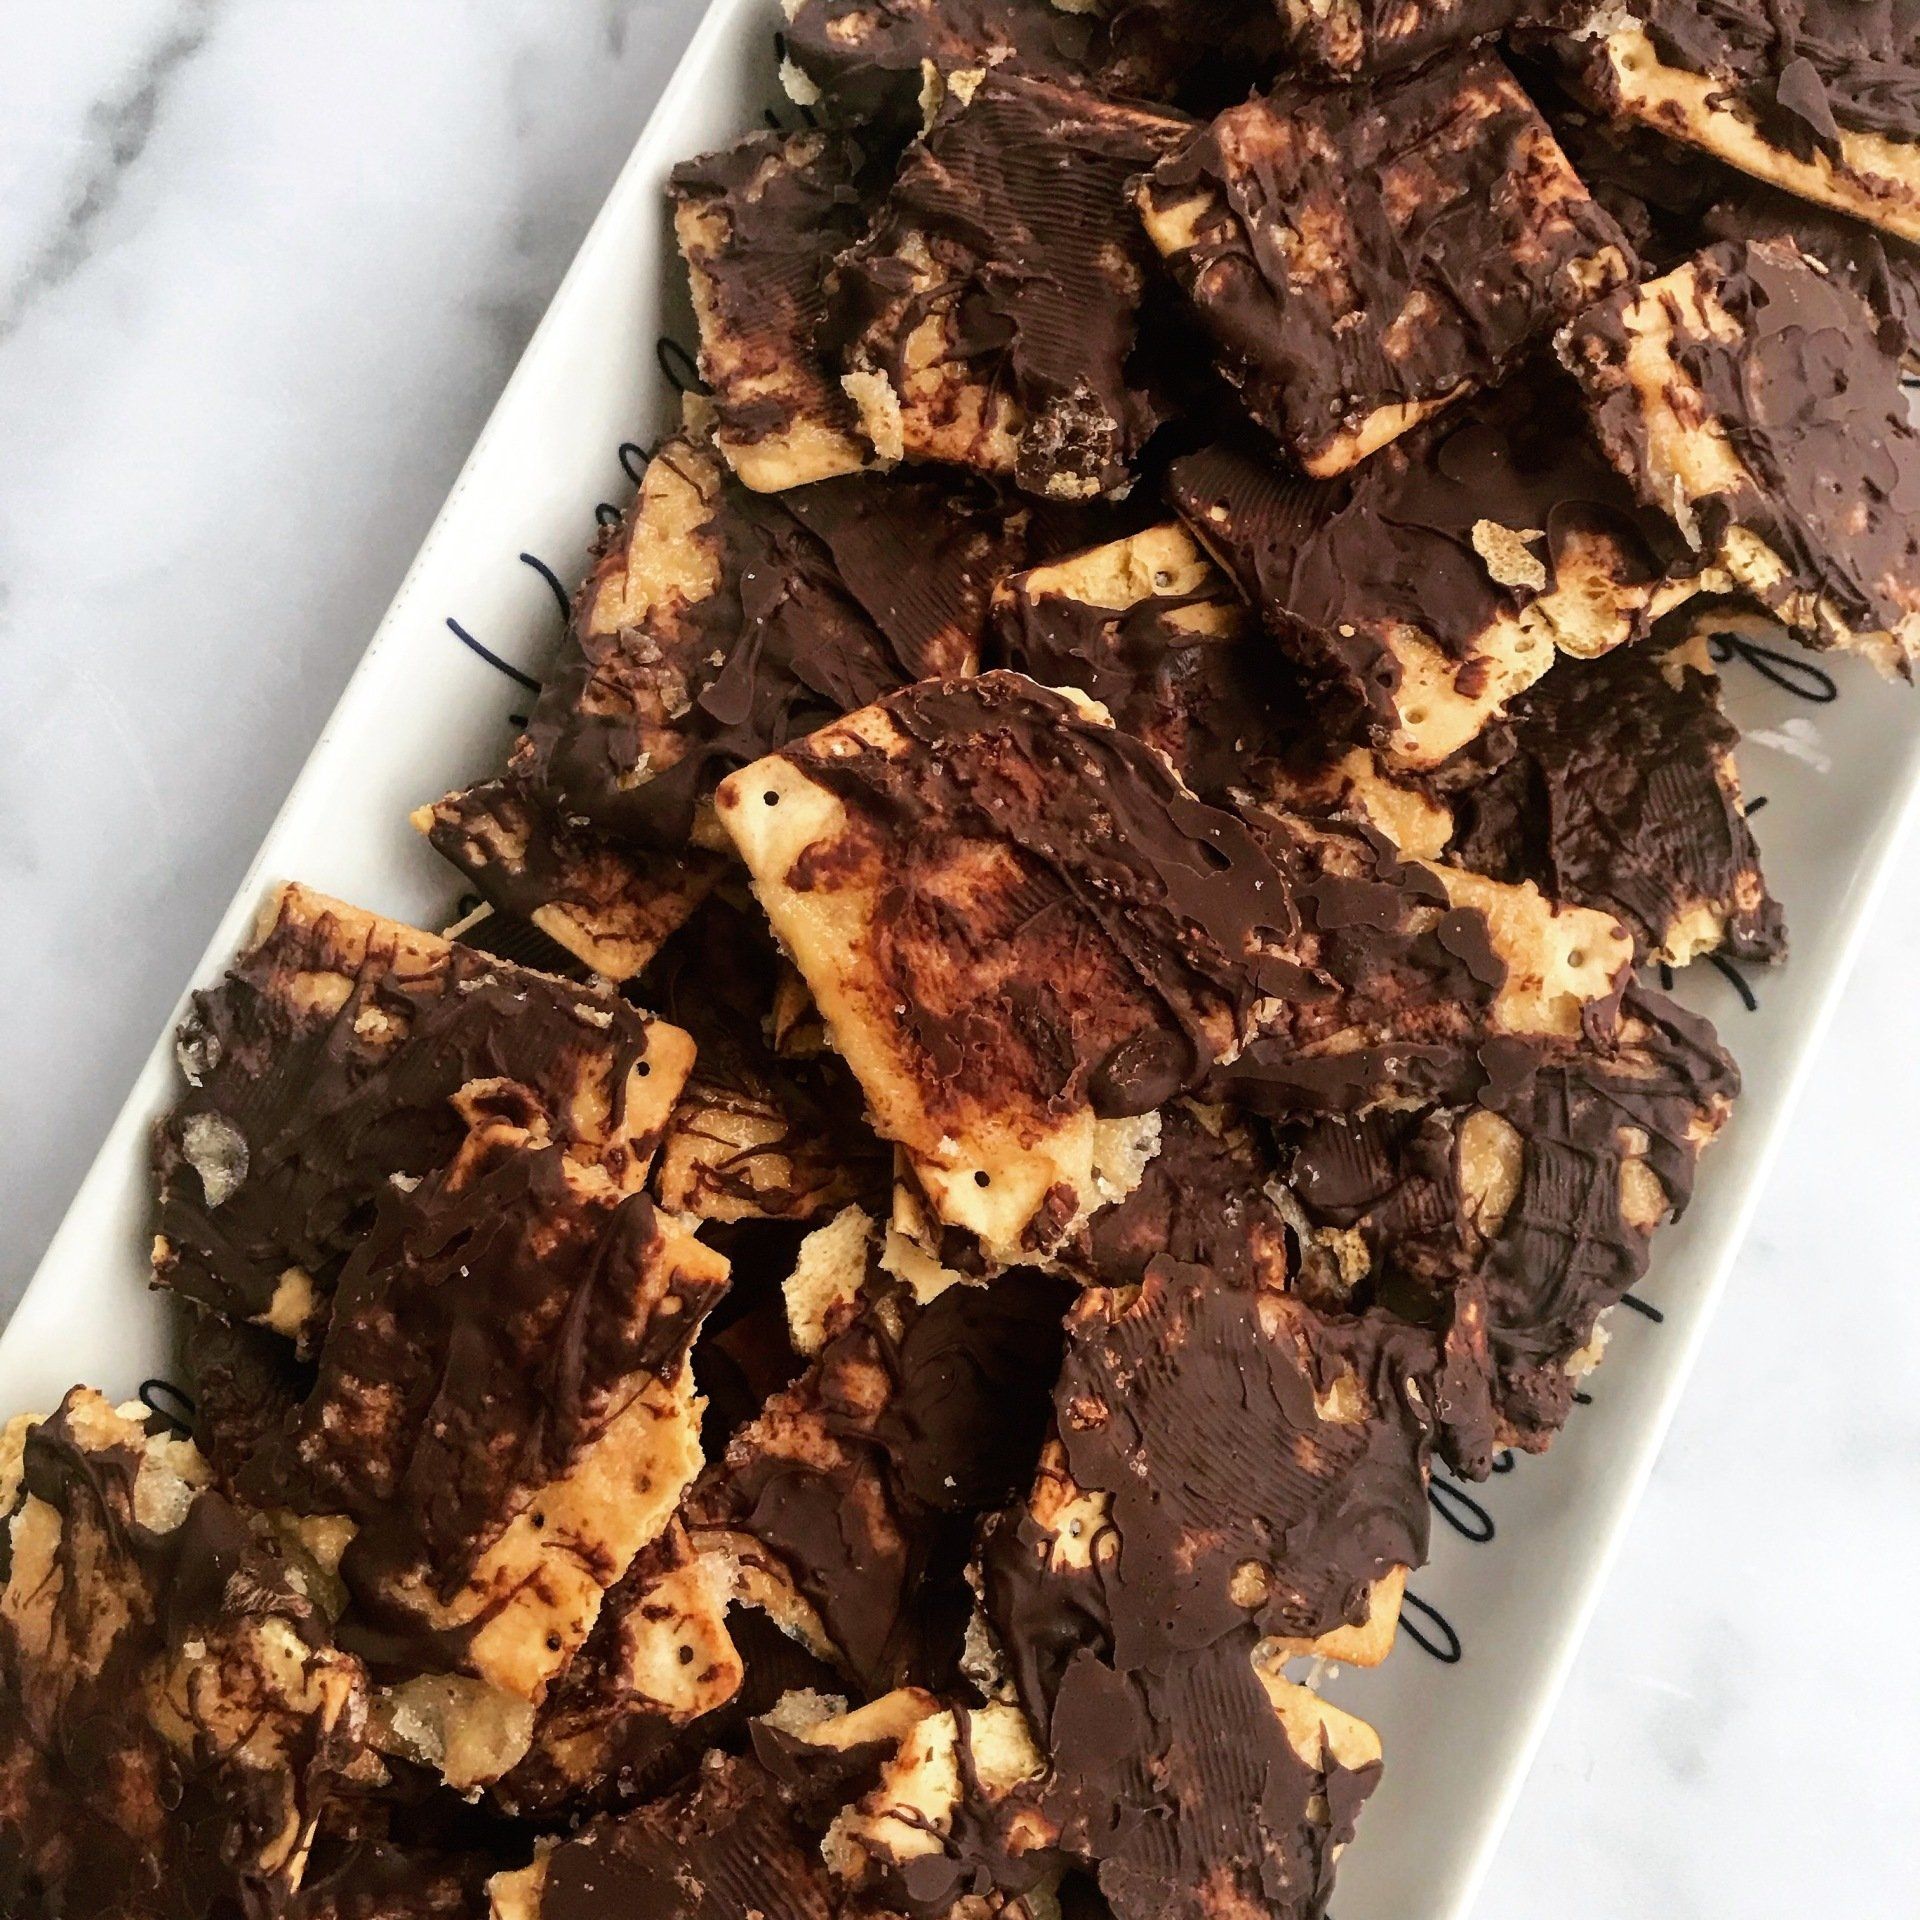
This dessert NEVER disappoints. I promise. Maybe you've heard it referred to as "Christmas Crack" or "Hanukkah Crack" or "Saltine Toffee Candy" or "Chocolate Covered Saltines" - nonetheless, it's delicious whatever the heck you call it! This dessert is perfect year-round, for any occasion. Chocolate Bark been a tradition in our family since before I can even remember (though I don't even know what our official name for it is!) Over the years, I've introduced the "gluten free version" to friends and coworkers, and it's always a hit and devoured down to every last bite. It's chocolatey, salty, sweet, crunchy, and addicting. Bonus points for it being such an easy dessert to whip up, plus it's easy to make in a large batch for any crowd. The best part about this Chocolate Bark is that there are so many gluten free crackers out there that work well. I've used both Glutino and Schar table crackers and both are fantastic! Any type of cracker that's thin and mimics the classic saltine cracker would be great options. The gluten lovers never even notice that this dessert "is gluten free" ... unless of course, they see me snagging bites for myself!

Food Network has always been one of my favorite TV channels to watch. There are so many great personalities on there and it’s really fueled both my love and inspiration for cooking. One show I used to watch regularly, which I’m honestly not sure is even still on air, is Semi-Homemade with Sandra Lee . Have you seen it? She’s this quirky, goofy woman who whips up creations in the kitchen that are semi-homemade, meaning not everything is made from scratch. Some items are already made whether they are frozen or bought from the store, but she adds her own flare to them and the end result is still a unique and creative recipe. In all reality, the average person (myself included!) doesn’t have time to make everything from scratch all the time, so finding shortcuts is the key to keeping sane in the kitchen some days! That’s why I love this recipe. I really am unskilled in the baking arena, so when it comes to breads or other baked goods, I need all the help I can get. I use premade dinner rolls from a local bakery or the frozen aisle in the grocery story, but then elevate them by adding butter, garlic, parsley and shredded cheese. Semi-homemade deliciousness.

This is one of my favorite Thanksgiving dessert recipes, which is also perfect to enjoy all throughout fall! One of my college girlfriends introduced this to me years ago. Since then, I've adapted it and shared it with family and friends, and it's a hit every year during the holidays. It's made with only four ingredients (yes, really!) - cool whip, vanilla pudding mix, canned pumpkin and pumpkin spice. The recipe also couldn't be easier to make and comes together in just a matter of minutes, making it the perfect candidate for a last minute dessert if you find yourself in a pinch. My favorite cookies for dunking are vanilla wafers or ginger cookies, both in the gluten free variety, of course!